Master Essential Techniques for Flawless Charcoal Grill Lighting
Choose the Ideal Charcoal to Elevate Your Grilling Experience
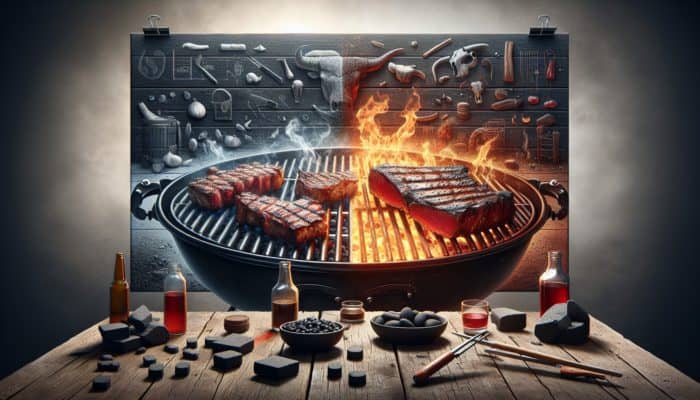
Learning how to light a charcoal grill efficiently starts with choosing the right charcoal, a crucial step for an enjoyable grilling session. You can opt for Briquettes or lump charcoal, each offering unique benefits that cater to various cooking methods. Briquettes provide a uniform shape and a slow burn, making them perfect for lengthy cooking times, ensuring consistent heat throughout your barbecue. On the other hand, lump charcoal, derived from natural hardwood, ignites rapidly, burns hotter, and adds a deep, smoky flavor that enhances the taste of your grilled meals. If you’re aiming for a quick sear on meats, lump charcoal is your best option, but for low-and-slow barbecue sessions, briquettes might be more suitable.
Your charcoal choice can also reflect local traditions. In southern regions, where barbecue culture thrives, many grilling aficionados have preferred brands that have proven their worth over time. Investigating local favorites can greatly assist in your decision-making process. Additionally, consider the environmental impact of your charcoal selection; many brands now offer sustainable options that appeal to environmentally conscious consumers. Ultimately, your selection should align with your cooking style, flavor goals, and the memorable experience you want to create for your guests during your next outdoor gathering.
Optimize Your Charcoal Arrangement for Easy Ignition
The arrangement of your charcoal is vital for both the lighting process and overall cooking performance. For optimal ignition, stack your charcoal in a pyramid or cone shape. This layout maximizes airflow, allowing oxygen to circulate effectively, which encourages a fast and uniform lighting process. A strong base of coals supports those above, ensuring that even the lower coals catch fire successfully.
When arranging your charcoal, consider the size of your grill and the amount of food you plan to cook. Smaller grills may only need a compact pyramid, whereas larger grills can handle a more extensive setup. Always leave spaces between the coals to promote air circulation, which is essential for maintaining a steady flame. Experimenting with different configurations will give you personal insights into what works best for your unique grilling style.
How to Ensure Proper Airflow by Adjusting Your Grill Vents?
Proper airflow is crucial for igniting your charcoal and sustaining a consistent flame. Before you light your grill, ensure that the vents are fully open. These vents regulate the oxygen supply to the coals, directly influencing the heat generated. If your grill has adjustable vents, start by opening them completely to encourage a vigorous ignition process. This initial surge of oxygen is vital for helping the charcoal reach the high temperatures needed for rapid cooking.
Once your charcoal is lit, you can modify the vents to control the flame’s intensity. Closing the vents will decrease airflow and subsequently lower the temperature, which is especially useful when moving from searing to slow cooking. Additionally, be aware that changing weather conditions, like windy days, can affect your grill’s airflow. Regularly checking your vents will help you maintain ideal cooking temperatures, resulting in perfectly grilled dishes.
Explore the Benefits of Using a Chimney Starter for Charcoal Lighting
What is a Chimney Starter and How Does It Work?
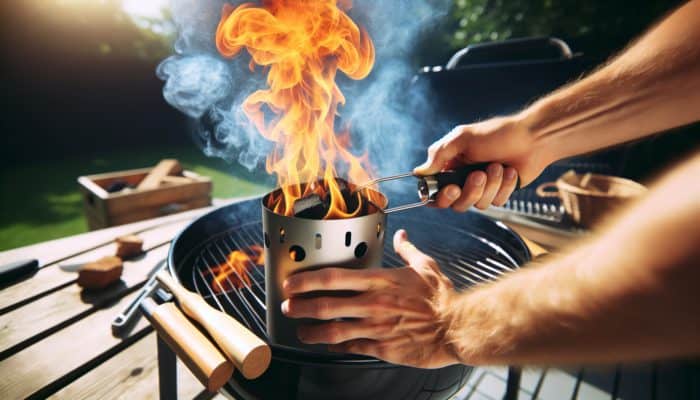
A chimney starter is an indispensable tool for charcoal grilling aficionados. This cylindrical metal device removes the need for lighter fluid, allowing you to ignite charcoal more efficiently and safely. The design leverages a chimney effect, drawing air through the bottom to create a natural draft that evenly ignites the charcoal. Unlike traditional methods that lead to uneven heating and possible chemical contamination from lighter fluid, a chimney starter offers a straightforward solution for those who are passionate about grilling.
This tool simplifies the lighting process while enhancing the flavor of your food by ensuring that no chemical aftertaste from lighter fluid taints your dishes. For serious grillers, investing in a chimney starter is a wise choice. They come in various sizes, so selecting one that matches your grill is crucial for optimal results. This tool has gained traction among outdoor cooking enthusiasts in the United States, where grilling is not merely a cooking method but a beloved cultural tradition.
How to Use a Chimney Starter for Maximum Efficiency?
Learning to use a chimney starter effectively is a simple yet essential skill for every grilling enthusiast. Here’s an easy-to-follow guide:
- Gather your materials: chimney starter, crumpled newspaper or paraffin cubes, and your chosen charcoal.
- Place crumpled newspaper or paraffin cubes at the bottom of the chimney.
- Fill the chimney with your selected charcoal, ensuring there’s space at the top for airflow.
- Light the newspaper or paraffin cubes through the holes at the bottom of the chimney.
- Wait approximately 10-15 minutes until the coals are covered with a layer of gray ash.
- Carefully pour the hot coals into your grill, spreading them evenly for optimal cooking.
- Set the chimney starter safely on a heat-resistant surface.
By adhering to these steps, you ensure optimal lighting while minimizing the risk of flare-ups. This technique is ideal for anyone looking to enhance their grilling skills—especially during family cookouts or weekend barbecues where perfectly seared steaks or juicy burgers are the aim. The convenience of using a chimney starter has made it a preferred option for both novice and seasoned grillers alike.
Essential Safety Guidelines for Using a Chimney Starter
While using a chimney starter is generally safe, following a few safety precautions will enhance your grilling experience. Always place the chimney on a heat-resistant surface to avoid accidental burns or damage. Avoid using plastic or flammable materials as a base—opt for concrete or metal surfaces that can withstand high temperatures without posing any risk.
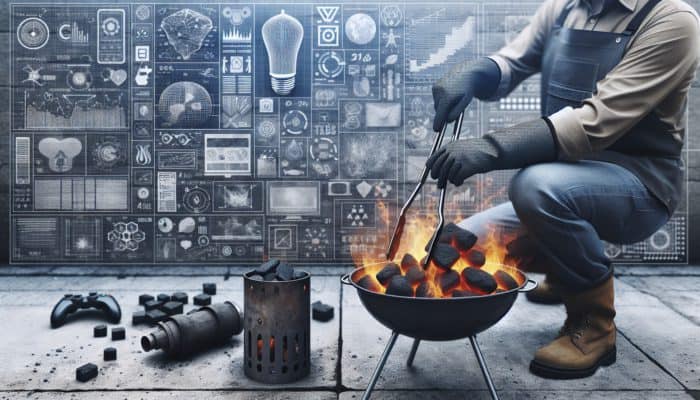
When handling the chimney after lighting, wear heat-resistant gloves to protect your hands from the extreme heat. The chimney can become very hot, so using long-handled tongs to pour the coals is advisable. Moreover, ensure you are using the chimney outdoors in a well-ventilated area to avoid inhaling smoke or fumes. After pouring the charcoals into the grill, allow the chimney to cool down completely before storing it. Following these guidelines will help you stay safe while enjoying the pleasures of grilling.
Implement Expert Strategies for Effortless Charcoal Grill Lighting
Proven Techniques from Experienced Grillers for Successful Charcoal Ignition
Many seasoned grillers have their tried-and-true methods for efficiently lighting charcoal. For example, numerous experienced chefs suggest using high-quality lump charcoal, which ignites more quickly and burns hotter than typical briquettes. Some enthusiasts favor well-known brands like Royal Oak or Fogo, recognized for their consistent performance and ability to enhance flavor.
Additionally, many grillers recommend utilizing lighter cubes made from compressed sawdust or paraffin wax, which provide a clean burn without chemical residues. Incorporating these items into your grilling routine can yield superior results. Furthermore, some experts advise pre-heating the grill lid for a few minutes before adding food to elevate the initial cooking temperature, especially for thicker cuts of meat.
- Use a high-quality chimney starter for even lighting.
- Choose natural fire starters over lighter fluid for a cleaner burn.
- Adjust grill vents to maintain airflow as needed.
- Experiment with a blend of lump charcoal and briquettes for optimal flavor and consistent heat.
These insights, refined through years of experience, can empower anyone to achieve success when lighting a charcoal grill. Remember, it’s all about discovering the right techniques and products that match your unique grilling style.
Actionable Steps for Consistently Achieving Perfect Grilling Results
<pAchieving consistent results when lighting your charcoal grill depends on mastering techniques and understanding the variables that influence the lighting process. Start with high-quality charcoal and the appropriate quantity for your cooking needs. Generally, fill your chimney starter to the top for a substantial barbecue session, while less may suffice for quicker meals.
Once your charcoal is prepared, prioritize airflow and fire management to ensure optimal performance. Initially, ensure your grill vents are fully open to encourage a robust flame. After the coals are lit and covered with gray ash, you can adjust the vents according to your cooking requirements. For low-and-slow barbecue, slightly closing the vents helps maintain a steady temperature, while fully open vents are ideal for searing steaks.
Moreover, consistently monitoring the grill’s temperature with an infrared thermometer or a grill gauge can help you determine when adjustments are required. Keeping a close watch on these factors will lead to the perfect grilling experience every time you light the grill.
Expert Insights into Common Mistakes When Lighting Charcoal
Even experienced grillers can encounter challenges when lighting charcoal, often leading to frustration or mishaps. A typical mistake is insufficient airflow, which can stifle flames and hinder ignition. Ensure your vents are fully open to allow for a steady stream of oxygen—this will facilitate a quicker lighting process.
Another frequent issue is improper charcoal arrangement. Overcrowding the charcoal can restrict airflow, resulting in uneven lighting. Arranging the coals in a pyramid or cone shape helps to avoid this problem and ensures that all pieces ignite efficiently. Additionally, many grillers underestimate the importance of using dry charcoal; wet charcoal struggles to light effectively and can create smoke issues.
If you often experience difficulties, consider switching to a higher-quality charcoal or exploring alternative lighting methods. Being aware of these common pitfalls can save you future grilling frustrations and enhance your overall experience.
Igniting Your Grill Without a Chimney Starter
Safe Guidelines for Using Lighter Fluid to Ignite Charcoal
When using lighter fluid, caution is essential to ensure a safe grilling experience. Start by applying a small amount of lighter fluid directly onto your charcoal. After soaking the coals, allow the lighter fluid to sit for a few minutes—this wait time enhances ignition by allowing the fluid to vaporize. It’s vital to use the right amount—excess fluid can lead to dangerous flare-ups upon ignition.
Once you’re ready to ignite, use a long lighter or a match to light the fire from a safe distance. Stand back, as the flames will rise quickly. Avoid adding lighter fluid to already lit coals, as this can cause hazardous flare-ups and potentially result in injuries or grill damage. After lighting, ensure the grill lid is closed, which helps the coals heat up quickly and evenly. Always keep a fire extinguisher or a bucket of water nearby for safety.
By following these safety measures while using lighter fluid, you can enjoy a smooth grilling experience without compromising safety.
What Are the Best Eco-Friendly Alternatives to Lighter Fluid?
For those seeking environmentally friendly alternatives to lighter fluid, several options can provide a clean burn while maintaining your grilling experience. One popular choice is utilizing paraffin fire starters, which are compact blocks that ignite easily and deliver a consistent flame without any chemical aftertaste.
Crumpled newspaper is another classic method; it’s simple and effective when placed beneath your charcoal in a chimney starter or directly in the grill. Additionally, you can create your own fire starters by soaking cotton balls in vegetable oil or wax, providing a natural ignition source.
For those preferring a modern approach, electric starters heat quickly and ignite charcoal without any chemicals. They are ideal for individuals wanting to simplify their grilling process while adhering to eco-friendly practices. By exploring these alternatives, you can maintain a clean and flavorful grilling environment.
How Long Should You Wait Before You Start Cooking?
Once you light your charcoal, patience is key. Allow the coals to burn until they are covered with a layer of gray ash, which generally takes about 15 to 20 minutes. This indicates that they have reached the perfect cooking temperature and are ready for grilling. Cooking on coals that haven’t fully ignited can lead to uneven heating, resulting in poorly cooked food.
During this waiting period, it’s important to ready your grill and food. Ensure the grill grates are clean and oiled to prevent sticking. Have your meats and vegetables seasoned and prepared. This not only optimizes the charcoal lighting time but also ensures a smoother transition from lighting to cooking.
Once the coals are ready, you can begin grilling with confidence, knowing that you’ve set the stage for a successful cookout.
Efficiently Using Electric Starters for Charcoal Lighting
Electric starters represent a contemporary approach to traditional grilling techniques, providing a safe and efficient method to ignite charcoal. These devices feature a heated element that quickly ignites the coals without using lighter fluid. To use an electric starter, place it among the charcoal, plug it in, and allow it to heat for about 10 minutes. Once the coals start to ash over, you can unplug the device and carefully remove it.
The advantages of electric starters extend beyond convenience—they also eliminate the risks associated with lighter fluid, resulting in a cleaner burn that enhances the flavor of your food. They are particularly useful in urban environments where conventional fire-starting methods may be restricted due to safety regulations.
Keep in mind that electric starters require a power outlet or generator, so be prepared if you plan to grill in a remote location. This method is especially beneficial during tailgating or camping trips, where convenience is essential for a hassle-free grilling experience.
Maintain a Consistent Fire for Perfect Grilling
How to Adjust Vents for Effective Temperature Regulation
Regulating the temperature of your charcoal grill is crucial for achieving perfect cooking results. The grill’s vents are your primary tool for managing airflow, which directly affects heat levels. Opening the vents increases the oxygen supply, which raises the temperature within the grill. This strategy is particularly effective when you need high heat for searing meats.
Conversely, if you aim to lower the temperature—ideal for slow-cooking or smoking—partially or fully closing the vents will limit airflow and cool the fire. Mastering this technique allows you to achieve a variety of cooking outcomes, making your grill versatile enough for everything from steaks to ribs.
Additionally, regional weather conditions can affect your grill’s performance. For example, grilling in windy conditions may require more frequent vent adjustments to maintain stable temperatures. Being mindful of these factors will help you maintain control over your grilling sessions and consistently produce delicious results.
Add More Charcoal During Cooking to Sustain Heat
As your grilling session progresses, maintaining a consistent heat level may require adding more charcoal to keep the temperature steady. However, adding charcoal is not as simple as just tossing it in randomly. To avoid disturbing the existing coals, carefully add a few pieces to the outer edge of the fire, allowing the new coals to ignite from the existing heat. This method ensures your cooking temperature remains stable without causing a significant drop in heat.
Timing is crucial when adding charcoal. Plan to introduce more coals if you notice the temperature beginning to dip, especially during longer cooking sessions. Opting for high-quality charcoal will help ensure that the new pieces ignite quickly, maintaining the desired cooking temperature. This practice is particularly advantageous during extended barbecues or when hosting large groups, ensuring that everyone enjoys perfectly grilled meals.
What Should You Do If the Fire Unexpectedly Goes Out?
If your charcoal fire unexpectedly diminishes, there’s no need to panic. Start by checking the grill’s vents; often, insufficient airflow is the culprit. Fully open the vents to enhance oxygen flow, which may help reignite the remaining coals. If this doesn’t work, you may need to take additional measures.
Adding more charcoal can help revive the fire, but be cautious not to overwhelm the existing coals. Alternatively, using a blowtorch or lighter wand can quickly reignite the coals, especially beneficial for those grilling late into the evening when temperatures can drop.
Understanding how to manage these situations will boost your confidence as a griller, ensuring you can effectively respond to any challenges that arise during your cooking process.
Reviving the Fire with a Chimney Starter
When your fire starts to fade, a chimney starter can be invaluable for quickly and effectively reviving it. Begin by filling the chimney with fresh charcoal and lighting it as you would for a new grilling session. Once the coals are burning brightly and covered with ash, pour them onto the existing coals in the grill.
This technique allows you to boost your fire without starting completely from scratch, making it a practical solution during longer cooking times. If the initial batch of coals is still somewhat hot, they will assist in igniting the new ones, restoring the necessary heat for cooking.
This method is particularly advantageous for barbecue enthusiasts who prefer low-and-slow cooking methods or are entertaining larger gatherings. The ability to quickly revitalize the fire can help maintain the momentum of your grilling session, ensuring your guests receive delicious, hot meals.
Monitoring the Fire’s Progress for Optimal Cooking
Regularly monitoring the fire’s progress is crucial for maintaining consistent cooking temperatures. Investing in a reliable grill thermometer can assist you in tracking the internal temperature and making necessary airflow adjustments. Keep an eye on how the coals are burning; a lively, bright fire indicates good oxygen flow, while a dull, ashy fire suggests it may be time to adjust the vents or add more charcoal.
Furthermore, be aware of how the food itself affects the fire. Items with high-fat content can create flare-ups that may require vent adjustments or relocating food to a cooler part of the grill. Periodically checking on your fire and making necessary modifications will lead to perfectly grilled dishes that impress everyone at your gathering.
Research-Backed Insights on Effectively Lighting a Charcoal Grill
Enhancing Flavor Through Proper Charcoal Lighting Techniques
Properly lighting your charcoal grill can significantly enhance the flavor of your grilled foods. Research indicates that evenly lit charcoal provides consistent heat, essential for achieving that desired sear on meats. When your coals are ignited correctly, they distribute heat uniformly, reducing the risk of hot spots that can lead to uneven cooking.
Moreover, the type of charcoal used plays a crucial role in flavor. For example, lump charcoal is known for imparting a richer, smokier taste compared to briquettes. This aspect is particularly important for those who take pride in their barbecue flavors. By focusing on the lighting process, you set the stage for a flavor profile that tantalizes your taste buds and leaves a lasting impression on your guests.
Highlighting the significance of proper lighting can elevate your grilling experience, helping you create memorable meals that keep your friends and family returning for more.
Reducing Cooking Time with Efficient Charcoal Lighting
Utilizing efficient lighting methods can significantly shorten the time it takes to prepare your grill, enabling faster cooking sessions. By mastering techniques such as using a chimney starter or electric starter, you can have your coals ready in just minutes, rather than waiting for traditional methods to take effect.
This efficiency is particularly advantageous for impromptu gatherings or weeknight dinners. You can go from a full grill to sizzling hot steaks in no time, catering to fast-paced lifestyles without sacrificing quality. The quicker your charcoal ignites, the sooner you can start cooking, leading to less waiting and more time enjoying delicious food with loved ones.
Promoting these efficient methods can help you become the grill master within your circle, showcasing your ability to deliver mouthwatering meals without lengthy waits.
Enhancing Safety with Proven Lighting Techniques
Research shows that using safe and proven techniques for lighting charcoal can significantly reduce the risk of accidents. Whether opting for a chimney starter or natural fire starters instead of lighter fluid, these methods foster a safer grilling environment.
By eliminating flammable chemicals from the process, you minimize the potential for flashbacks and flare-ups that can lead to burns or fires. Additionally, employing tools like heat-resistant gloves and long-handled utensils can enhance safety during both the lighting and cooking stages.
Prioritizing safety not only protects you and your guests but also fosters a more enjoyable grilling atmosphere. By embracing these proven techniques, you can focus on what truly matters—savoring great food and creating lasting memories with those you cherish.
Troubleshooting Common Grilling Issues
How to Address Unevenly Lit Charcoal Problems
If you notice that your charcoal lighting is uneven, there are several steps you can take to rectify the situation. First, examine your charcoal arrangement; overcrowding can obstruct airflow. Rearranging the coals into a pyramid shape can promote better lighting.
Moreover, adjusting the vents can enhance airflow and even out heating. Opening the vents will allow more oxygen to reach the coals, encouraging a more uniform burn. If unevenness persists, consider utilizing a chimney starter, as it ignites charcoal more effectively, ensuring that all pieces catch fire evenly.
These proactive measures will help ensure your grilling experience is not disrupted by lighting issues, allowing you to focus on preparing perfectly cooked meals.
What Can You Do to Prevent Excessive Smoke While Grilling?
Excessive smoke can detract from the enjoyment of grilling and may even alarm your neighbors. To prevent this, ensure that your charcoal is dry and well-ventilated. Damp charcoal is notorious for producing excessive smoke and can hinder your grilling efforts.
Furthermore, ensure the grill vents are open to facilitate proper airflow. Insufficient oxygen can lead to smoldering rather than burning, resulting in increased smoke production. Another helpful tip is to combine lump charcoal with briquettes, as lump charcoal typically burns cleaner and generates less smoke.
By implementing these strategies, you can enjoy a cleaner grilling experience that enhances, rather than detracts from, the flavors of your food.
What Should You Do If Charcoal Won’t Ignite?
If your charcoal refuses to light, remain hopeful. First, check the type and age of your charcoal; old or damp charcoal may not ignite efficiently, so consider switching to a fresher batch.
If using lighter fluid, make sure you’ve applied enough and allowed sufficient time for it to soak in before attempting to light. Alternatively, consider switching to safer methods, such as employing a chimney starter or natural fire starters, which often yield better results.
By understanding the common causes behind stubborn charcoal, you can adapt your approach and ensure that you’re able to get your grill fired up on any occasion.
How to Manage Flare-Ups During Cooking?
Flare-ups are a common occurrence during grilling, but they can be effectively managed with a few techniques. Start by assessing the fat content of your meat; fatty cuts tend to cause more flare-ups. If possible, trim excess fat before cooking to reduce this risk.
If a flare-up occurs, move the food to a cooler part of the grill until the flames subside. Alternatively, partially close the vents to decrease the oxygen supply, which will help lower the flames. You can also spread the coals to create more space between them, minimizing the likelihood of flare-ups.
By taking these precautions, you can enjoy a successful grilling session without the discomfort of uncontrollable flames.
Thoroughly Cleaning Up After Grilling
Safely Extinguishing the Coals After Use
Properly extinguishing your coals is essential for safe and effective cleanup after grilling. Start by closing the grill vents to cut off the oxygen supply, which will help suffocate the fire. Allow the coals to cool down completely, as this process can take several hours.
Never dispose of hot coals in a plastic or paper bag, as these materials can ignite and cause fires. Instead, once cooled, transfer the ashes to a metal container designed for safe disposal. This ensures you eliminate any risk of flare-ups, keeping your grilling area safe for future use.
By following these steps, you can confidently clean up after grilling, ensuring that your space remains safe and ready for your next culinary adventure.
Thoroughly Cleaning the Grill Grates for Enhanced Performance
Cleaning the grill grates is a crucial step in maintaining your grill and ensuring optimal performance. The best time to clean the grates is while they are still warm, as this makes it easier to remove any residual food particles. Use a wire brush specifically designed for grilling to scrub the grates thoroughly, focusing on any stuck-on bits.
For tougher residue, consider soaking the grates in hot, soapy water before scrubbing. Additionally, applying a light coating of cooking oil after cleaning can help prevent rust and sticking during future grilling sessions. Regularly cleaning your grates not only enhances the flavor of your food but also extends the life of your grill.
Taking care of your grill grates is an essential aspect of maintaining a clean and efficient grilling environment, ensuring that each cooking session is enjoyable and hassle-free.
Proper Disposal of Used Charcoal for Safety and Environmental Considerations
Proper disposal of used charcoal is vital for safety and environmental reasons. Once your coals have cooled completely, which may take several hours, transfer them to a metal container designed for disposal. This step is crucial to prevent any risks of fire, as even small embers can reignite if not handled correctly.
Avoid placing used charcoal in plastic or paper bags, as these materials are flammable and can lead to dangerous situations. If you’re environmentally conscious, consider using your cooled ashes in your garden, as they can contribute beneficial nutrients to the soil.
By adhering to these disposal guidelines, you can ensure safety while also maximizing the use of your used charcoal, contributing to a more sustainable approach to grilling.
Cleaning the Exterior of Your Grill for Longevity
Cleaning the exterior of your grill is equally important as managing the interior. Start by ensuring the grill is completely cool before beginning the cleaning process. Use a damp cloth to wipe down the exterior, removing grease and grime that can accumulate over time.
For stainless steel grills, consider employing a stainless steel cleaner to achieve a polished finish that not only looks great but also protects the surface. Pay particular attention to areas around the knobs and handles, where grease can build up and affect functionality.
Regularly tending to the exterior of your grill not only enhances its appearance but also prolongs its life by preventing rust and corrosion. A well-maintained grill not only performs better but also looks great in your outdoor space.
Storing Your Grill Properly for Extended Lifespan
The proper storage of your grill can significantly extend its lifespan. Once the grill is completely cool, cover it with a weather-resistant cover designed to fit your specific model. This protects it from the elements, including rain, snow, and UV rays that can cause damage over time.
If possible, store your grill in a dry, sheltered area, such as a garage or shed, to further shield it from environmental factors. Additionally, ensure the grill is free of debris or residue before covering it, as this can lead to unwanted odors or pest infestations.
By following these storage guidelines, you can rest assured that your grill will be ready for action whenever you’re next inspired to fire it up.
Frequently Asked Questions (FAQs)
What is the best type of charcoal for achieving optimal grilling results?
The best type of charcoal for grilling depends on your needs; lump charcoal ignites quickly and offers a robust flavor, while briquettes provide a consistent burn for longer cooking sessions.
How long does it take to light charcoal with a chimney starter?
Using a chimney starter, charcoal typically takes about 10-15 minutes to ignite fully and become ready for cooking, depending on the amount and type of charcoal used.
Is it advisable to use lighter fluid with a chimney starter?
No, using lighter fluid with a chimney starter is unnecessary and can introduce chemicals that affect the flavor of your food; the chimney starter is designed to work without it.
What temperature should charcoal be at for effective grilling?
Charcoal should reach a temperature of around 400°F to 450°F for direct grilling, indicated by an even layer of gray ash covering the coals.
How can I prevent flare-ups while grilling?
To prevent flare-ups, trim excess fat from meats, avoid overcrowding coals, and move food to cooler areas of the grill if flames become excessive.
Is it safe to use an electric starter indoors?
No, electric starters should only be used outdoors in well-ventilated areas, as they can produce smoke and fumes that are hazardous in closed spaces.
What could be causing my charcoal not to light?
Your charcoal may not be lighting due to dampness, the age of the charcoal, or insufficient airflow; check these conditions and try using a chimney starter for better results.
How can I keep my grill clean?
To maintain a clean grill, regularly clean the grates while they are warm, use a wire brush to remove residue, and wipe down the exterior with a damp cloth after each use.
What should I do with used charcoal ashes after grilling?
Once cooled, you can dispose of used charcoal ashes in a metal container or use them in your garden as a natural fertilizer, as they can provide valuable nutrients.
How often should I clean my grill for optimal performance?
You should clean the grill after every use to maintain optimal performance and flavor. For a more thorough cleaning—such as deep scrubbing and inspections—perform this task every few months, depending on usage.
Connect with us on Facebook for more grilling tips!
The Article How to Light a Charcoal Grill Easily: Quick Tips for Beginners appeared first on https://pitmastersarsenal.com
The Article Light a Charcoal Grill Easily: Quick Tips for Newbies Was Found On https://limitsofstrategy.com